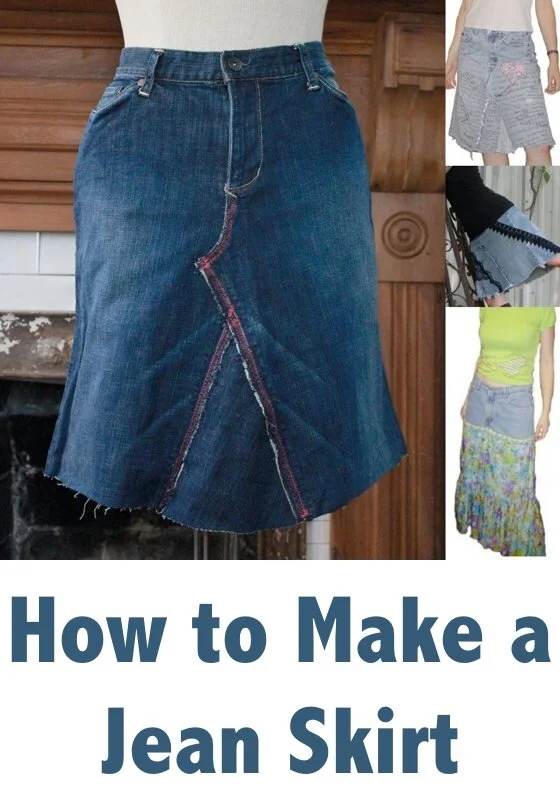
How to Make a Skirt Out of Jeans
When I first started learning how to sew, I instantly fell in love with denim. I've always been a t-shirt and jeans kind of a girl, and denim is still my favorite material to work with. I love its durability and I've found it to be a really great material to sew with, since most denim doesn't stretch very much.
Denim is such a great blank canvas for so many projects. Here I'll walk you through one of my favorites, how to make a jean skirt. This classic reconstructed denim skirt, upcycled from a pair of old blue jeans, is something I've done countless times over the years! I'll also give you some ideas and tricks for making it your own, based on many years of my own experimentation.
Things you'll need for this project:
-
An old pair of blue jeans (This project can also be easily adapted for other types of pants as well, including corduroy, khaki and cargo pants.)
-
Fabric scissors (Remember to keep your fabric scissors separate from other scissors – NEVER use them to cut paper.)
-
Seam ripper
-
Sewing machine
-
Denim needles for your sewing machine
-
Thread
-
Straight pins

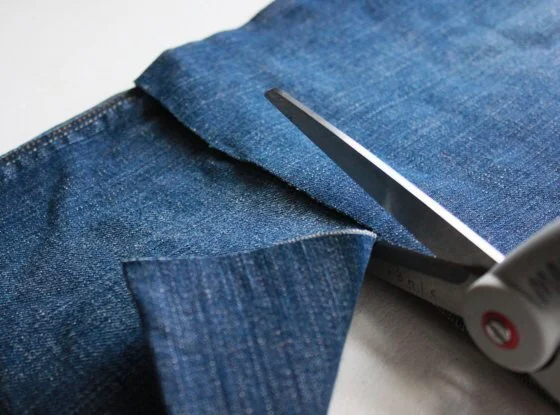
The first thing I usually do when making a denim skirt is to cut the jeans off to the length I want them. You're basically going to turn them – very briefly! – into jean cut-off shorts. You can try them on or hold them up against yourself and use a pencil or fabric marker to mark where to cut.
I usually like my skirts just above the knee, which is what I will show you how to do here. You can make your skirt any length, though some details will change slightly for a super short or super long skirt.
To make an ankle length skirt, skip this first step and don't cut any length off of your jeans.
After you cut, you'll have 2 leg pieces left over – keep these because you'll need them later.
If you want to make an ankle length skirt, you'll need to find extra fabric – either from another pair of jeans or you can use other types of fabrics. Something like denim, canvas or other heavyweight cotton will work best.

Next, use your seam ripper to rip out the inseam of the jeans. That's the seam that runs along the inside of each leg up to the crotch. On the front of the jeans, you will also rip the seam up to the bottom of where the zipper starts.
On the back, you'll rip up the middle seam, stopping just below where the belt loops are. You can rip out this whole seam up to the point where the belt loop begins, but I've found that the top two inches or so of this seam are usually fine to keep intact. The main thing is that later you want to be able to lay it out so that it's flat. So you can go back and rip more out if you need to make the fabric lay flat when you start pinning it together.
To make the seam-ripping go faster, you can usually take out a whole section of the seam at once, instead of ripping out stitches individually, by holding the seam ripper pointed away from you and towards the top of the jeans. If you get it just right, you can sort of push the seam ripper straight up the line of the seam, and it won't take as much time.
If you're in a hurry, you can also carefully cut these seams apart instead of using the seam ripper. However, I do NOT recommend this. I've made skirts both ways, and I'm always much more pleased with my results when I use a seam ripper to open the inseam. You'll be able to lay everything out flatter and you can get that cool deconstructed look by laying out the seams flat. In my opinion, the extra work at the beginning is worth the way it looks at the end.

Now that you've got your seam open, you can clean up and remove those loose threads.
Once that's done, use your fabric scissors to cut open each of your leg pieces, so that you get two big rectangles of flat fabric:

Next, find a flat surface to lay out your skirt. The method I use will create an a-line skirt, flattering for just about any body type.
On the front of the skirt, take the top piece that is just under the zipper section and pin that flat on top of the fabric from the other side. On the back of the skirt, you'll do the same thing:


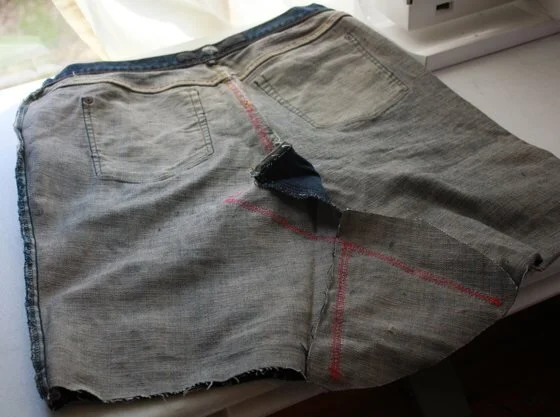
Now, take your leg pieces of fabric and use them to create a triangular panel underneath both the front and back sides where it's open. I like to line up the leg piece at an angle, slipping it under the edges of skirt opening. Try to keep everything as flat as possible while you pin it together.

After pinning, I cut the bottom of the leg piece even with the rest of the skirt. Then I'll cut most of the excess out from underneath. I usually leave some extra on the edges for sewing, and then once I've sewn everything together, I'll trim the excess fabric more closely.


After everything is pinned together, now it's time to sew!
Make sure to use a needle made for denim or heavy fabrics in your sewing machine.
I usually use regular all-purpose thread. You can match the color of your thread to the denim, or I often like to use a fun contrasting color, especially if I plan to do some appliqué detail later on the skirt.

Starting at the bottom hem of the skirt, sew a straight stitch up each section you've pinned together. Pull out the straight pins as you go along.

After you've sewn all of the pieces together, try on the skirt to make sure it fits and everything looks right. Then you can go back over your stitches to reinforce them. I like to use a zig-zag stitch at least once to reinforce the stitching. Denim likes to fray, so using these 2 different types of stitches helps secure your stitches and prevents it from fraying past your stitching.

You can also use this same technique along the bottom hem of the skirt to keep it from fraying too much. I usually leave my bottom hem unfinished and let it fray naturally, but it's a matter of personal preference!
After you're finished sewing, you'll want to flip the skirt inside out and trim off any excess fabric.

Now you have a finished denim skirt! Easy, right?

You can leave it as is or decorate it. Here are a few ideas on how to do just that:

This was one of the first denim skirts I ever made. This was made from an old pair of jean shorts and a crazy vintage dress. I chopped the dress in half, and later made the top into an altered blouse.
I attached the bottom of the vintage dress to this denim mini skirt I had crafted from the shorts. To attach it, first sewed a seam around the top of the dress skirt (it had a few layers I wanted to sew together), then pinned the top of the dress skirt to the inside edge of the bottom of the denim skirt. I sewed the two together, then added some lace appliqué over the seam to tie it all together.
To make a denim mini skirt, you can use the same steps I showed you earlier, but you get to skip most of the work involving the triangular panel. Usually, depending on the cut of the original jeans, you can just lay the crotch and butt flaps over each other and sew together, since the length of the mini skirt is so much shorter. Here is another mini skirt I did:
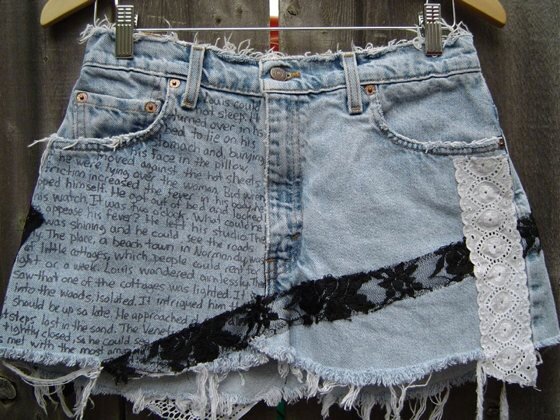
On the skirt just pictured, I covered one side of the front of the skirt in Sharpie marker graffiti. This is a favorite embellishment technique of mine, as you'll see. It's super cheap and easy, though it does take some time and patience. Also, even though I used permanent Sharpie marker, with repeated washings it does fade.
You'll also see another one of my favorite embellishment techniques here – lace overlay. You can use flat lace ribbon (your local fabric store should have plenty of options, and there are also numerous Etsy and eBay shops that stock this), or you can cut pieces of larger lace fabric.
Things to note about using lace: it IS delicate and while I have plenty of denim and lace skirts I've made for myself that are going strong, depending on the fineness of the lace, it can be easy to snag. I try to use lace that has a thicker weave for denim appliqué.
To sew on lace ribbon, or any other appliqué, I use basically the same technique I used to sew the skirt together. Pin the lace to the denim fabric, laying it out on a flat surface first and then pinning. Then I carefully sew over the lace using a straight machine stitch. Pull out the pins as you go. Once I've sewn over it once I go over it again a second or third time, near the edge with a zig-zag stitch to hold it in place and prevent fraying. Some fabrics fray more than others – a lace ribbon usually has edges that shouldn't fray too much, but if you've cut your appliqué fabric out from a larger piece of lace fabric, you'll want to be extra careful to go over the edges with multiple stitches.
If you purchase lace ribbon to do appliqué on denim, make sure to get the flat lace. A lot of the lace ribbons out there have the curled edge, which is great if you want to put it along the bottom of a dress or something, but not so good if you mean to sew it flat onto a denim skirt.

Here is another denim mini skirt I made, again using the Sharpie marker graffiti technique.
On this one, I also added a ruffle hem of silver fabric along the bottom edge. Here's a great tutorial on how to make a ruffle hem.
I also removed the back pocket (with my trusty seam ripper!) and created a Union Jack flag shape using hand-sewn flat sequins in black and silver. Once I had sewn all of the sequins on (it takes a LONG time), I used the sewing machine to sew the pocket back on to the front of the skirt. The sequins are pretty delicate so I didn't want to wear them out faster by sitting on them. So on the front of the skirt they go!
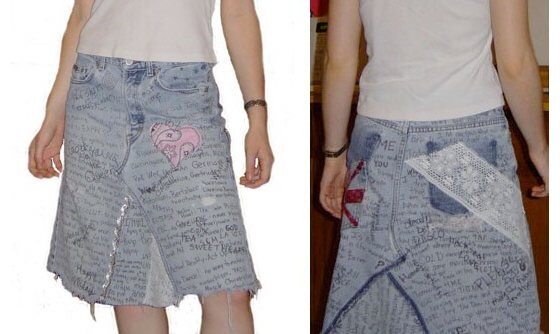
This is another skirt I made using similar techniques. Sharpie marker graffiti, lace overlay, an appliqué heart made from handkerchief fabric and another sequin pocket. (Notice the pocket is on the back on this one – this was my first attempt. Lesson learned here was to put the pocket on the front next time!)

Here you can see my very first attempt at Sharpie marker graffiti! I covered this entire pair of jeans with Shakespearean sonnets, written in permanent marker. Later on, I turned these jeans into this skirt:
I like the lace overlay technique a lot, as you can see:


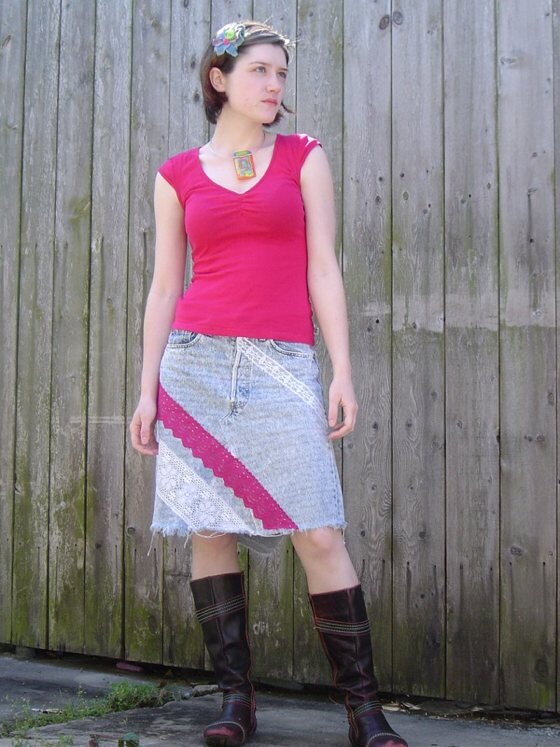
This is an ankle length denim skirt I made as a custom order. As I mentioned previously, you can use the same technique I showed you earlier to make a full ankle length skirt, but you will usually need some extra fabric. Here I had to borrow some fabric from another pair of jeans in order to fill in the triangular panels to make sure they were long enough.
Once the skirt was sewn together, I created diagonal strips of lace. I kept it simple with neutral colors – mostly black with one strip of teal lace to add some interest.
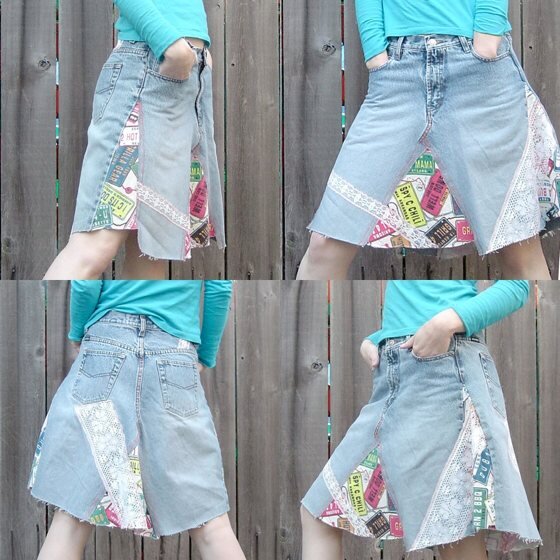
Here is another example of adding other types of fabric as the triangular panels. This license plate themed fabric is actually a heavy canvas, pretty close in weight to denim, so it worked nicely as a substitute for denim.
I did the front and back triangle panels as usual, but I also opened up the side seams and added a triangle panel to each size as well. Here is another tutorial explaining this 4 panel method.

I live in New Orleans, so the fleur de lis has been a popular theme for appliqué on my skirts.
Notice here how both the tan skirt and the eggplant colored skirt are actually made from corduroy pants. On the tan skirt, I went for a more straight pencil skirt style and left the narrow triangle open as a front slit. Sometimes the cut of the original pants dictates what will look best when the garment is reconstructed. The white skirt was actually already a skirt, and I added a fleur de lis detail on the front and on both back pockets.


This is a cowgirl themed skirt I did, using appliqué, Sharpie marker graffiti and a little hand-sewing of sequins. (Can you tell I like sparkly things?)
I drew and cut out the cowboy boot shape out of red bandana fabric. This type of cotton fabric frays easily, so I made sure to stitch over the edges really well. I added some "Rhinestone Cowgirl" sparkle by sewing some sequins on top by hand.
The red piece of fabric on the back was pieced around the back pocket. It's a piece of sparkly fabric too!
The "Rhinestone Cowgirl" text was drawn onto the back pocket with red and black Sharpie permanent marker.

Here is another skirt with a theme: London Showers! A red fabric appliqué umbrella and black tulle appliqué rain cloud, with hand-sewn sequin raindrops coming down.
On the back, the "London Showers" text and the bright Union Jack on the back pockets are done with Sharpie markers. The larger Union Jack shape was done with contrast color machine stitching. I went through a period where I liked to do a lot of free stitching in crazy colors:

You can see some of that free stitching here. These were bright green denim shorts which I converted to a skirt and added a ruffle hem. Then I stitched, stitched, stitched on top using the sewing machine!
Here's another:

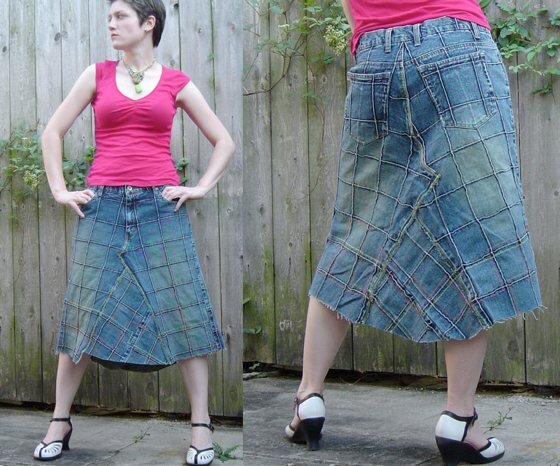
This was a crazy pair of jeans I found at the thrift store. They already had that repeating square shape on them, so I wanted to play with that, and after I put the skirt together, I went over the bottom half with various colors of crazy geometric stitching. I used a couple of stitching styles, straight stitch and zig zag stitch, to make the colors really pop.

Here is another one of my early skirt creations. I had added the flannel patches when the jeans were still – jeans. I love how super deconstructed this one came out. These flannel patches were one of my first experiences with learning the importance of using multiple stitches on certain types of appliqué. The flannel frays REALLY easily – definitely stitch over this a few times, with multiple types of stitches.

These pairs of jeans had seen some abuse, with rips and paint stains from gutting and rebuilding New Orleans homes after Hurricane Katrina and the 2005 floods. I patched up the holes and rips, and continued the theme, adding appliqué letters with denim scraps leftover from another project.
I hope my past projects have given you some ideas for what you can do with your denim! It's such a fun material to work with, I hope you love it as much as I do!
Have you ever tried deconstructing your old jeans, or other old clothes? How'd your DIY turn out?
Leave a comment below and let me know!
How to Make a Skirt Out of Jeans
Source: https://www.badasscreatives.com/blog/how-to-make-a-jean-skirt-recycled-denim-diy